Since I have been so slack about posting
Fashion Friday on Friday, a new day is born...
Sassy Saturday! Today's feature is the corkscrew bow, which proved a little more difficult then I had imagined. Usually I can look at things and figure out how to make them, but since Mini doesn't own any of these bows, this posed a little problem. I had hoped to find a tutorial on the
Internet that I could just link, but all the tutorials I found did not work 100%, so I combined some of their ideas with my own to provide a tutorial for you.

 Items needed: pins, needle and thread, skinny dowel rods, ribbon, liquid starch, hot glue gun, pan, oven, and hair clips.
 Step One: Dip entire ribbon in the liquid starch, so that the entire ribbon is wet, but not dripping.
 Step Two: Pin the end of the ribbon to the dowel rod.
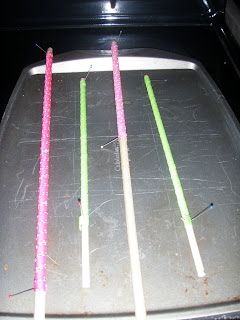
 Step Three: Wrap the ribbon around the dowel rod and then secure the other end with a straight pin; I ended up wrapping 6 dowel rods.
 Step Four: Bake in the oven at 275 degrees for 20 minutes. Then let cool and twist off of the dowel rod carefully.
 Step Five: Cut the corkscrews into similar lengths; I used 12 corkscrews for each bow so that each would be full. Mix the corckscrews up and then gather them in the middle. Stick a needle and thread through the center trying to go through the majority of the ribbons.
 Items needed: pins, needle and thread, skinny dowel rods, ribbon, liquid starch, hot glue gun, pan, oven, and hair clips.
 Step One: Dip entire ribbon in the liquid starch, so that the entire ribbon is wet, but not dripping.
 Step Two: Pin the end of the ribbon to the dowel rod.
 Step Three: Wrap the ribbon around the dowel rod and then secure the other end with a straight pin; I ended up wrapping 6 dowel rods.
 Step Four: Bake in the oven at 275 degrees for 20 minutes. Then let cool and twist off of the dowel rod carefully.
 Step Five: Cut the corkscrews into similar lengths; I used 12 corkscrews for each bow so that each would be full. Mix the corckscrews up and then gather them in the middle. Stick a needle and thread through the center trying to go through the majority of the ribbons.


Well, you didn't waste any time getting started on those, huh? hehe!!! They are adorable :) I think I may have figured out what I want for Owen's room, by the way!
ReplyDelete